Showing posts with label velcro. Show all posts

Tuesday, December 8, 2015

Fantasy Fabric Needle Cases

I have five new needle cases ready for the Anna Templeton Tea & Sale, this weekend. Felt is used inside to hold needles and coloured Velcro keeps them closed. I love making the fantasy fabrics for my smaller projects. They just glisten!

Before
After

Check out more needle cases:
Enjoy!!
PS
These make great / quick gifts, too!!

Monday, November 30, 2015

Pincushions

Do you have a favorite pincushion? I have several that I use all the time in my studio. I prefer large ones when working on a large work surface. That's why my starfish works perfectly.


The pincushion by my one of my machines is rectangular shaped to fit in front within easy reach. I have velcro on its bottom and on the table. The one below is very old. I made it from melton cloth which was leftover from a coat I made.


My work horse sits on a thick rubber mat. The mat is also my pincushion and scissors holder. As you can see, it works perfectly!


Today, I finished several new pincushions for the Anna Templeton Tea & Sale on December 11 - 13. These are suitable to sit in front of a machine or to carry in a sewing pouch. Stick-on velcro can be placed on the bottom easily or hand stitched in place. You will need a sticky part for the table.  Metallic thread was used for the needles and thimble. 

All designs used in the embroidery machines are all our own.


Friday, February 27, 2015

What Happened to Tuesday?

I know I posted on Tuesday but it has disappeared! My post was about the Sewing Portfolio shown below. I made a point of posting everyday since January. That's very confusing. I'm sure you remember seeing this on Tuesday. In fact, I had comments about this from some readers.

View #1 was an exhibit piece.
View # 2 is part of my collection.
Don't you remember me telling you about the window screen I used for the inside pockets?
And the green Velcro strip along the inside left fold. The glue is attached with the Velcro. I am soooo not good with this deletion of my post!! Oh well, time to move on!!! You'll get two posts from me today! Cheers!!!

# 1 Exhibit piece, sold

# 1, inside, partly folded to show back flap

#1 fully opened showing inside

# 2, personal collection

#2 inside view.

Monday, April 14, 2014

Sewing Portifolio (2)

Sharon Boggon, from Pintangle, posted about What is a Hussif . I'm not going to rewrite what she has written as you can visit her blog to do that. She has made her own hussif in the crazy quilting / embroidery style. I, too have been interested in making sewing cases for carrying my stitching project supplies. A few years ago, I designed and created my very own and entered it in a show. It sold! Then, of course, I had to make another one for myself.

Closed, it measures 8" x 12" and when opened, it is 12" x 25". I used Bali Batiks for this project with nylon window screen used for the inside pockets. Some machine embroidery has been added to the pocket edges with variegated embroidery thread. I considered using fabric for the pockets but then I would never know what's inside them. As you can see, the front has been embellished with some of my Fantasy Fish. A magnetic bag clasp keeps it together. I added a length of green Velcro along one fold to hold small things such as a glue stick. The cotton threads are strung on a cord with a plastic toggle which keeps the threads from sliding off. There is a place for most of my small sewing / embroidery gadgets and supplies!

I did post about this same project in 2010. However, this post has more close up photos.
Enjoy!


The back of sewing portfolio with another pocket


Nylon window screen is used for inside pockets.

Note the clasp on cord to hold small pair of scissors and the
toggle on the cord beneath the threads,

The edges of the nylon window screen are embroidered

Velcro is used so needle case, pincushion and holder can be removed

Fold over pocket


Velcro stuck to the glue


Saturday, April 21, 2012

Fabric Books

I have been asked where I come up with some of the various topics for my blog posts. Well, some ideas are directly from my own art while other ideas are the results of reading other blogs. Sometimes a word or picture will also trigger something. Today's post idea is the result of reading an email from Pin Tangle. Sharon Boggon found a great tutorial from Shade Tree Art with a step by step tutorial on how to make a basic fabric book. Take a look at it.

For the most part, we consider fabric books as those for young children. Consider making one for your sewing samples. Or make a Sewing To Go Book (that name just popped into my head) with pockets to hold floss, needles, scissors and other small supplies!

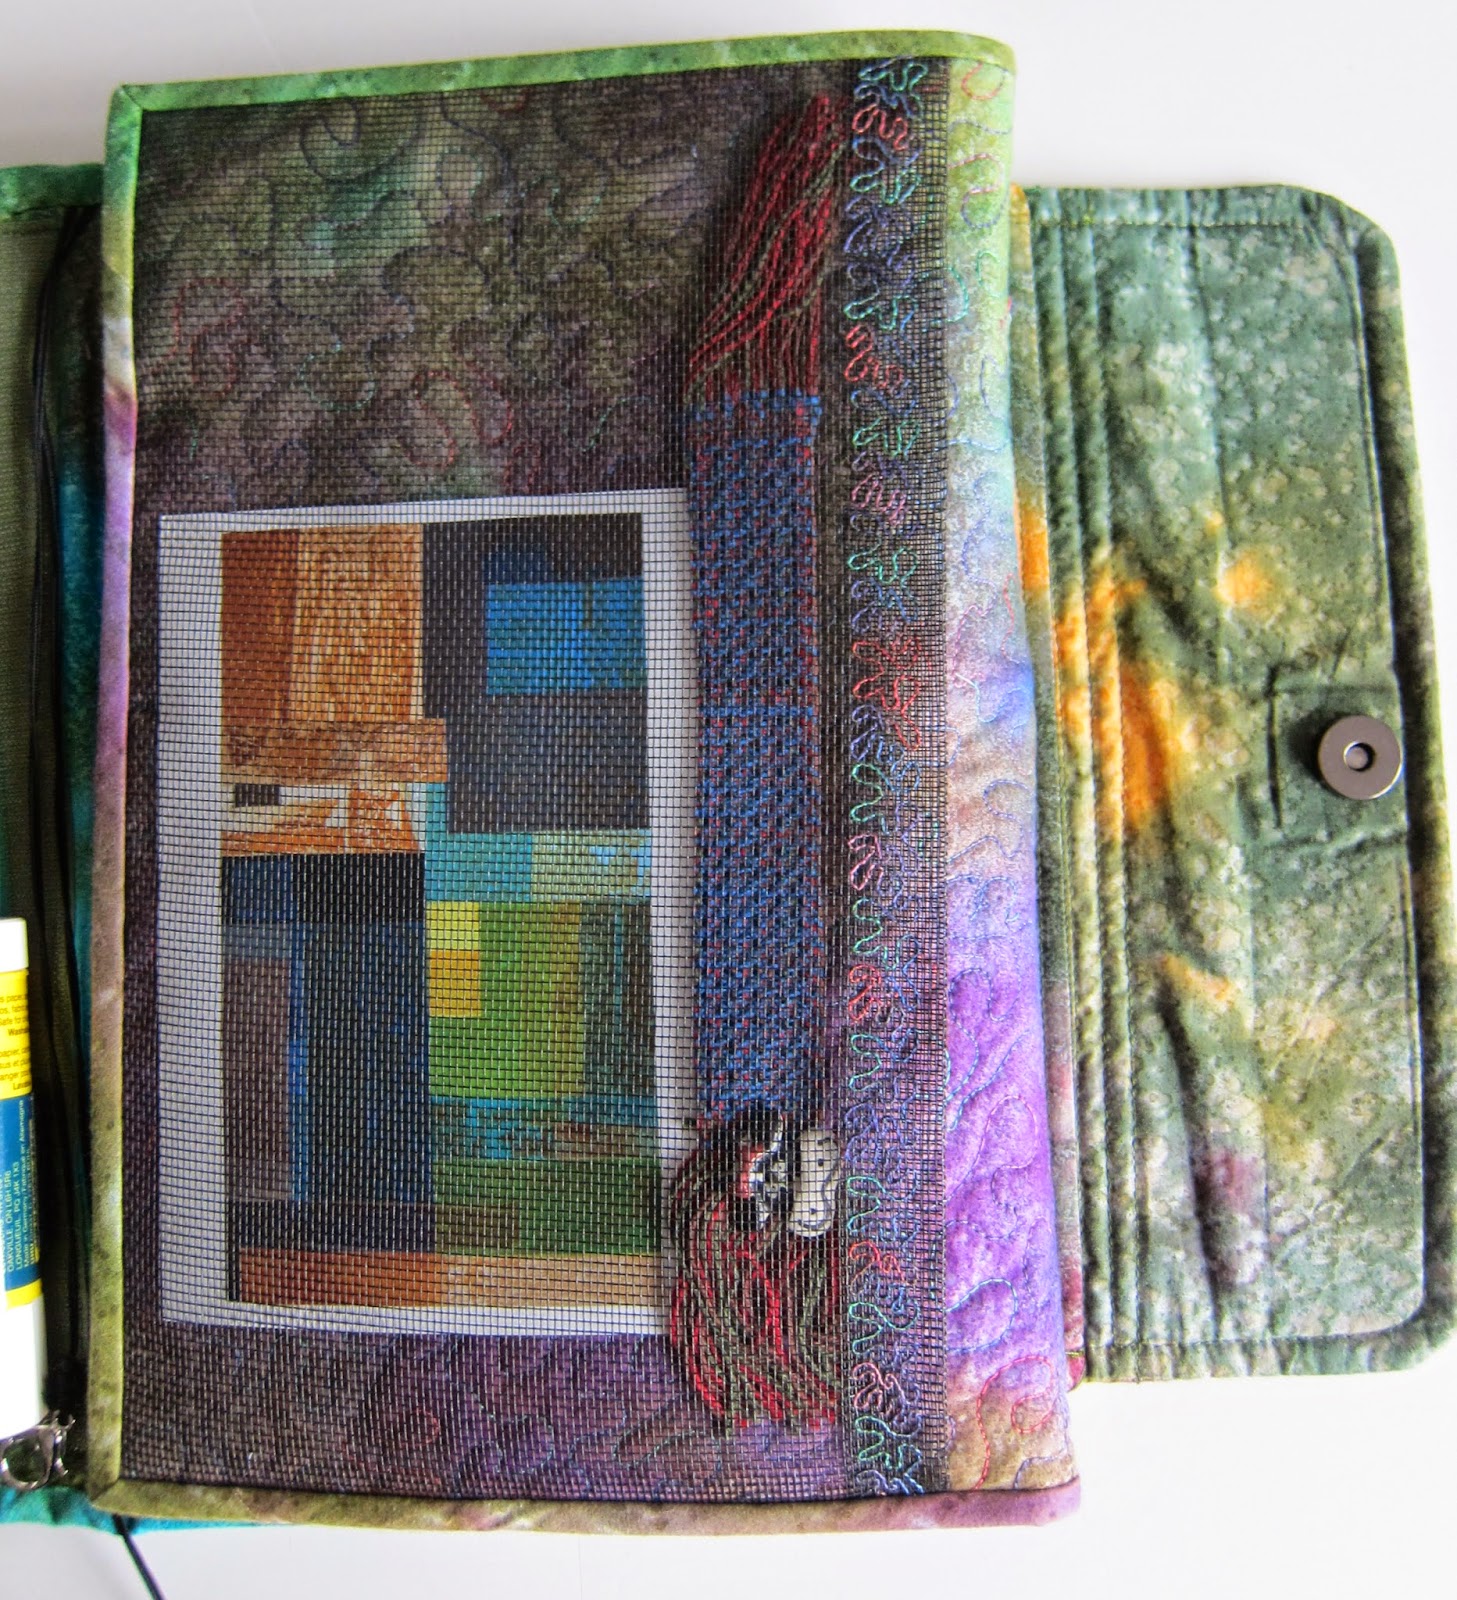
This is my sewing portfolio that I designed and made a couple of years ago. It has a magnetic bag closure and lots of pockets. I could have added take out pages using velcro strips -  maybe another time. However, the glue stick is kept in place with velcro. A strip of the soft side of velcro is stitched on the wide fold over section and the sticky piece is stuck on the glue container. It works quite nicely.

I think this book from Shade Tree Art, can also be made with children in mind. For example, each page could be a different colour with applique figures added. I found a couple of tutorials for children's books here and here (this one is made from scraps). Add this one about shapes. You get the idea!
Enjoy!

Saturday, April 7, 2012

Finished Work

The production work I was doing a few days ago is finished. I have been making these 'Holders', which can be used to carry credit cards / business cards / gift cards / jewellery, for a number of years. They are perfect for taking on cruises as you can put them in a pocket. No one wants to take a purse everywhere they go when on a ship (or so I've been told) so these are perfect. I had a special request last year to put a cord on one so that it could be worn around the neck.

These holders are made from lots of glittery fabrics, yarns and threads. I make a base fabric a little bigger than what's needed. This base is stitched with Sulky Sliver threads. I cut my pattern from this stitched piece. Velcro is used to fasten the flap. A label with my name on it is sewn to the inside. I will write about labels on another day. Each 'holder' is numbered and one-of-a-kind. So if you have one of these pieces, you actually have a little piece of original art. No two are ever the same.