I have another miniature piece finished. Needing a quick name, I've called it Birch Trees. Yes, very original, I know, but something else might pop into my head. I'm open to suggestions. In creating art, I find that coming up with an appropriate name,is the hardest thing to do. I don't want something corny.
The trees and rocks are hand appliqued in place. Check HERE in a post from a few years ago (scroll down) to find out how I created the rocks for using in my pieces. The daisies were first hand stitched onto Aqua Magic water soluble fabric, spritzed with water and left to dry then stitched on the background fabric. The lupines were free motion stitched onto purple organza. French knots were used for the dandelions and tiny forget me knots.
Below is the piece before adding the extra flowers.
Showing posts with label rocks. Show all posts
Saturday, March 9, 2019
Friday, September 19, 2014
Brigus
Last Sunday, I took a drive out to Brigus, Conception Bay. There had been a promise of some sun but that didn't happen. However, I did get some nice photos around the community. My concentration was on closeups as I was thinking hand embroidery. I can see using dyed cheese cloth for the rocks with lots of embroidery threads and other embellishments. What do you think? As you can see, that's what I did in this commissioned piece of the red fishing shed. It worked quite well.
Here's some of the photos I took!
Enjoy
Here's some of the photos I took!
Enjoy
Sunday, April 29, 2012
Take a Look
I've been working on another art piece. This one will measure approximately 13 3/4" x 5 1/2" before framing. I have the background partly done. Dyed, stitched cheesecloth is working out well for the rocky cliffs. Ignore the colour of the cheesecloth in the second photo. It should be a darker grey. This piece is causing some frustration at the moment. I just have to put it aside for awhile.
Monday, April 16, 2012
Latest Work
I just finished another piece of wall art. It's a donation for a silent auction later in May. At this time, I'm just showing a small corner of the piece. The 'rock' is silk that was printed from my computer. Refer HERE for information on printing onto fabric. The daisies were embroidered individually and hand stitched in place. The orange flowers are French knots. In the completed landscape there is a hand dyed sky, hills and a large tree with foliage. The skeleton tree was thread painted onto organza. Foliage was added after it was placed on the background.
Wednesday, April 11, 2012
Printing on Fabric
Years ago (1999), when I first started in the business of creating fabric 
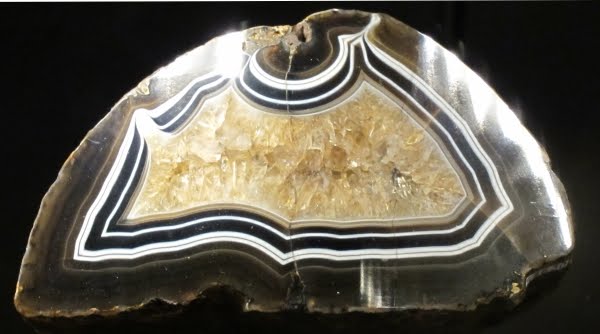
landscapes, rock fabric was the hardest to find. When I did come across any, it was way off scale. So I decided to search for other methods to get the fabrics I wanted. My search led me to Bubble Jet Set 2000, invented and manufactured by the C. Jenkins Co. This product 'has revolutionized the way we print on fabric!' As they further state, this non-toxic chemical formula is designed to treat fabric so that permanent images could be printed directly on fabric using an Ink Jet Printer. I have been using this product for years. I take lots of photos of rocks and cliffs to be used in fabric printing. However, I will usually manipulate the photo, sometimes stretching it, before printing out a page of 'rocks'. When working on a piece of art, I will cut up the page and make rocks the size needed for it. I prefer to use silk instead of cotton for the 'rocks' as it is so nice to needle turn and applique in place.
I do print my fabric labels onto 200 thread count cotton (see photo below). After I print and heat set the labels, I put 'fast 2 fuse' interfacing on the back before cutting them out. The labels are ironed on to a project as well as stitched in place. I really don't trust the 'glue' for long time use. I have purchased pretreated white cotton from C. Jenkins and this cuts down on production time. The silk, however, still has to be treated with the liquid.
The iceberg, shown on the second photo, was printed onto cotton, cutout and stitched in place. The sandy beach is from recycled silk that was purchased at Value Village (second hand clothing shop). These shops sometimes have clothes that are perfect for a particular project. All the leather and suede used for the backs of my wearable art pins, come from such places. And, it's way cheaper than going to a tannery for scraps.

Thursday, March 29, 2012
Work in Progress - Windows
Last Sunday I showed you the 'clapboard' pieces for my miniature art pieces. Now I have some of the windows in various stages of completion. The basket of colourful fabrics are some of the ones used for window trims. I still have some machine stitching left to do. The foilage, rocks, and flowers will be the last to be added.
Monday, March 5, 2012
Back Garden 03 - Work in Progress
Here is a bit more of my progress on the Back Garden art piece. Part of today was spent stitching trees and foilage on green organza. Rocks as well as flowers will be part of the piece. The rock fabric beside the tree is printed onto silk using an inkjet printer. I take photos of rocks among other things. This particular rock was taken at Cape Spear a few years ago.
Wednesday, November 3, 2010
Stone Henge
![]() |
| photos by Judy Cooper |
My friend and I took a day tour while visiting England. We went to Stone Henge, Salisbury (to see the cathedral) and Bath. It was a very memorable trip. Our guild, Michael, was priceless!
During the summer months, it's possible to get private tours of Stone Henge where you get to see the stones up close. These tours occur at sunrise and sunset. In any case, you get an audio tour which works very well. It was an interesting morning and I'm glad I experienced it.
Thursday, August 19, 2010
Canadian Museum of Nature, Ottawa
While in Ottawa this summer, I visited the Canadian Museum of Nature. One of the exhibits I found interesting was the Vale Earth Gallery. The rocks and minerals were exquisite. Here's some photos from that gallery. These have possibilities for some hand embroidery or felting. What do you think?


Monday, June 7, 2010
In All Its Glory
I thought I would share this piece, In All Its Glory. It was first exhibited at the Grand National Quilt Exhibition, Ontario, Canada. This textile piece represents a small part of the Newfoundland coastline. The rocks are made from bits and pieces of silk which are hand appliqued to the background. I take lots of photos of rocks, play around with the images, and then print them onto white silk. Enlarging a rock often produces interesting results. I will then cut this up to make rocks for the picture. For this image, I also used commercial green cotton which I cut in short strips and pulled some of the threads to make a fringe. Snipping the fringe makes the grass lengths irregular. The lupines were stitched free motion on the sewing machine, stiffened with fabric stiffener, and stitched in place.
Subscribe to:
Comments (Atom)


